Step-by-Step Guide

Set Up LiteLLM with
CC Switch

A complete guide to install CC Switch, create a LiteLLM API key, and route Claude, Codex, and other AI coding tools through the FeedMob LiteLLM service.

Video Walkthrough
Before You Start: Two Web Addresses

This process uses two different web addresses with completely different purposes. This is the most common source of mistakes, so please note them first.

PurposeAddress
1 Register your account & manage keys (web portal) https://litellm.feedmob.ai/ui/
2 The service address you enter into CC Switch https://litellm-api.feedmob.ai
Create your account and key on address 1; but the service address you enter into CC Switch must always be address 2. If you mistakenly use address 1, the desktop tool may open normally but routing through LiteLLM will not work correctly.
1

Install CC Switch

Download and install CC Switch from the official site:

Open CC Switch Download Page
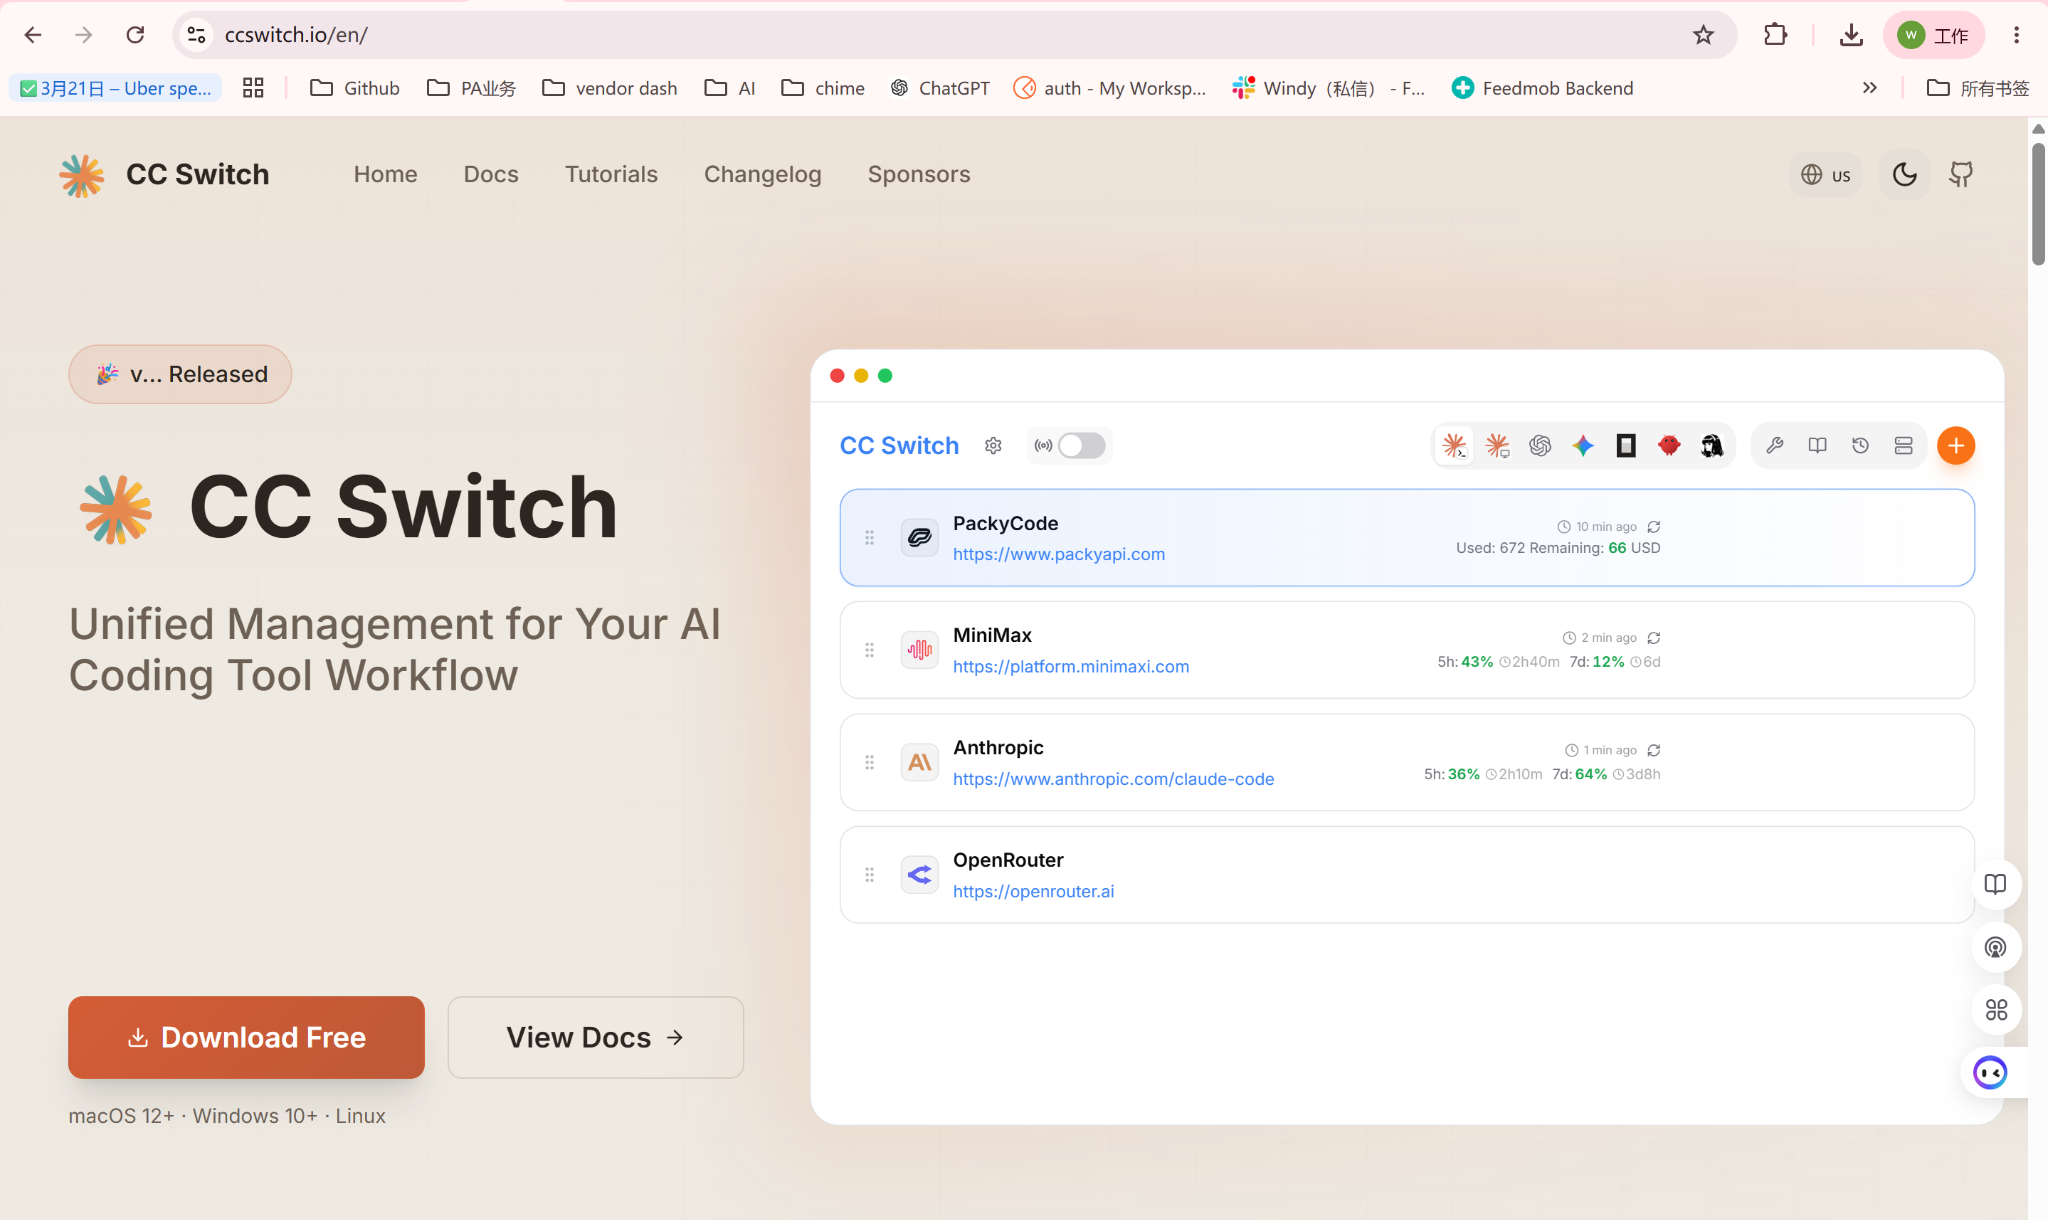
CC Switch download page
CC Switch website - download the app for your operating system
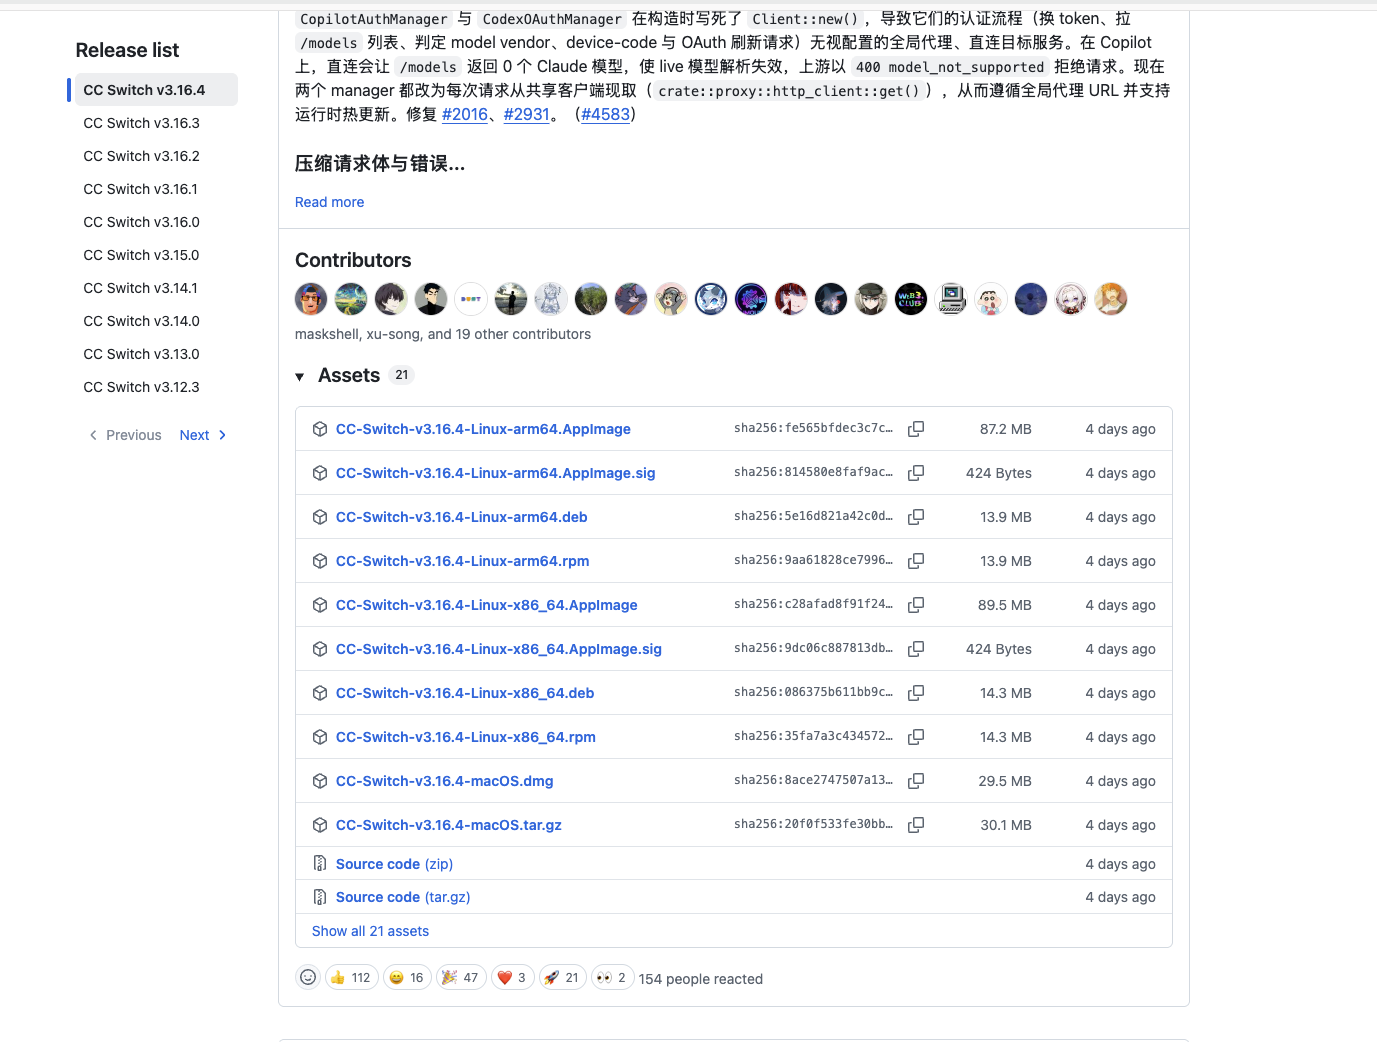
  1. Click Download Free on the CC Switch website. The button opens the GitHub Releases page.
  2. In the Release list, select the latest CC Switch version, then scroll down to Assets.
  3. Download the installer that matches your operating system. For macOS, choose CC-Switch-v3.16.4-macOS.dmg.
GitHub Releases Assets list for CC Switch
GitHub Releases - select the latest version, open Assets, and download the installer for your operating system
After installation, launch CC Switch once so the app can create its local configuration files and routing service.
2

Create a LiteLLM API Key

Get access instructions from the team

Please reach out to Rao or the Dev team to obtain the LiteLLM login credentials and access instructions.

Log in and create a key

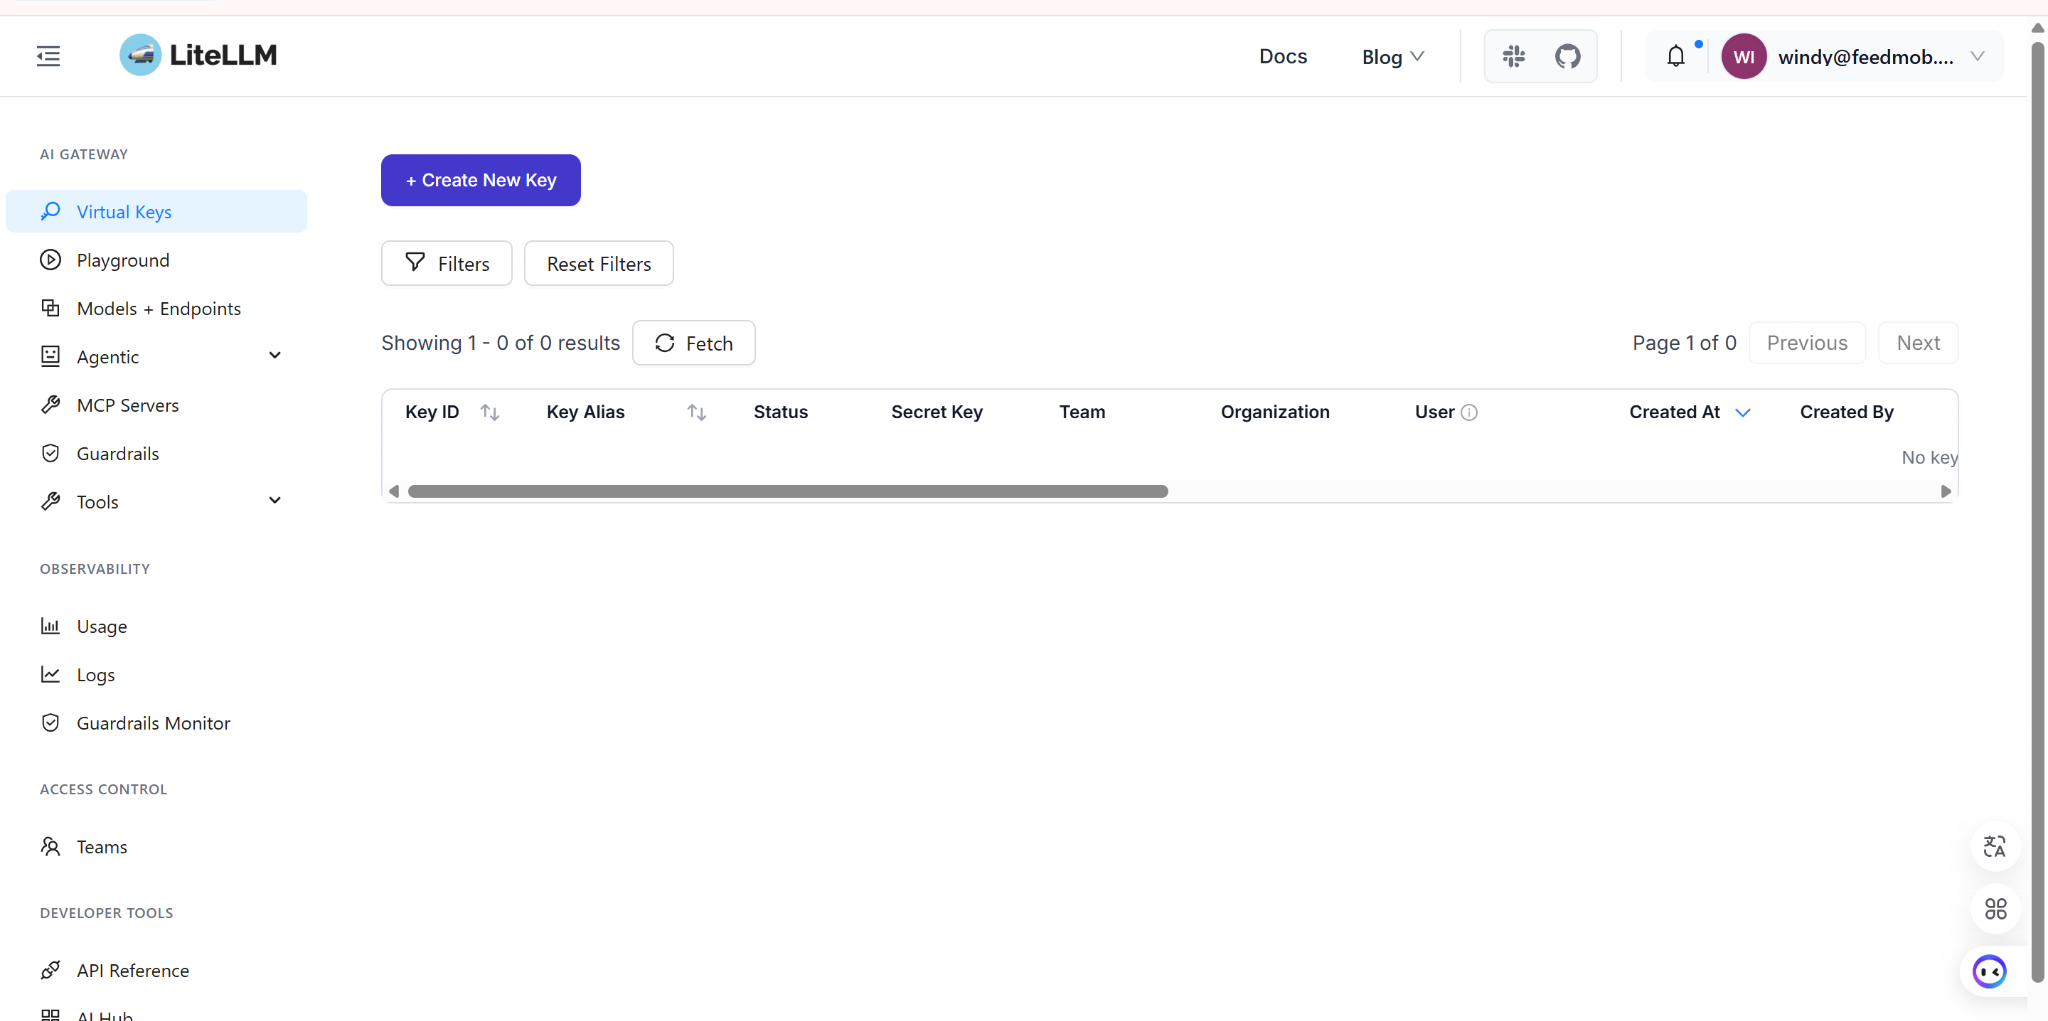
  1. Open the portal in your browser: https://litellm.feedmob.ai/ui/
  2. Log in with the credentials provided by the team.
  3. Find the Virtual Keys page in the menu.
  4. Click the Create New Key button.
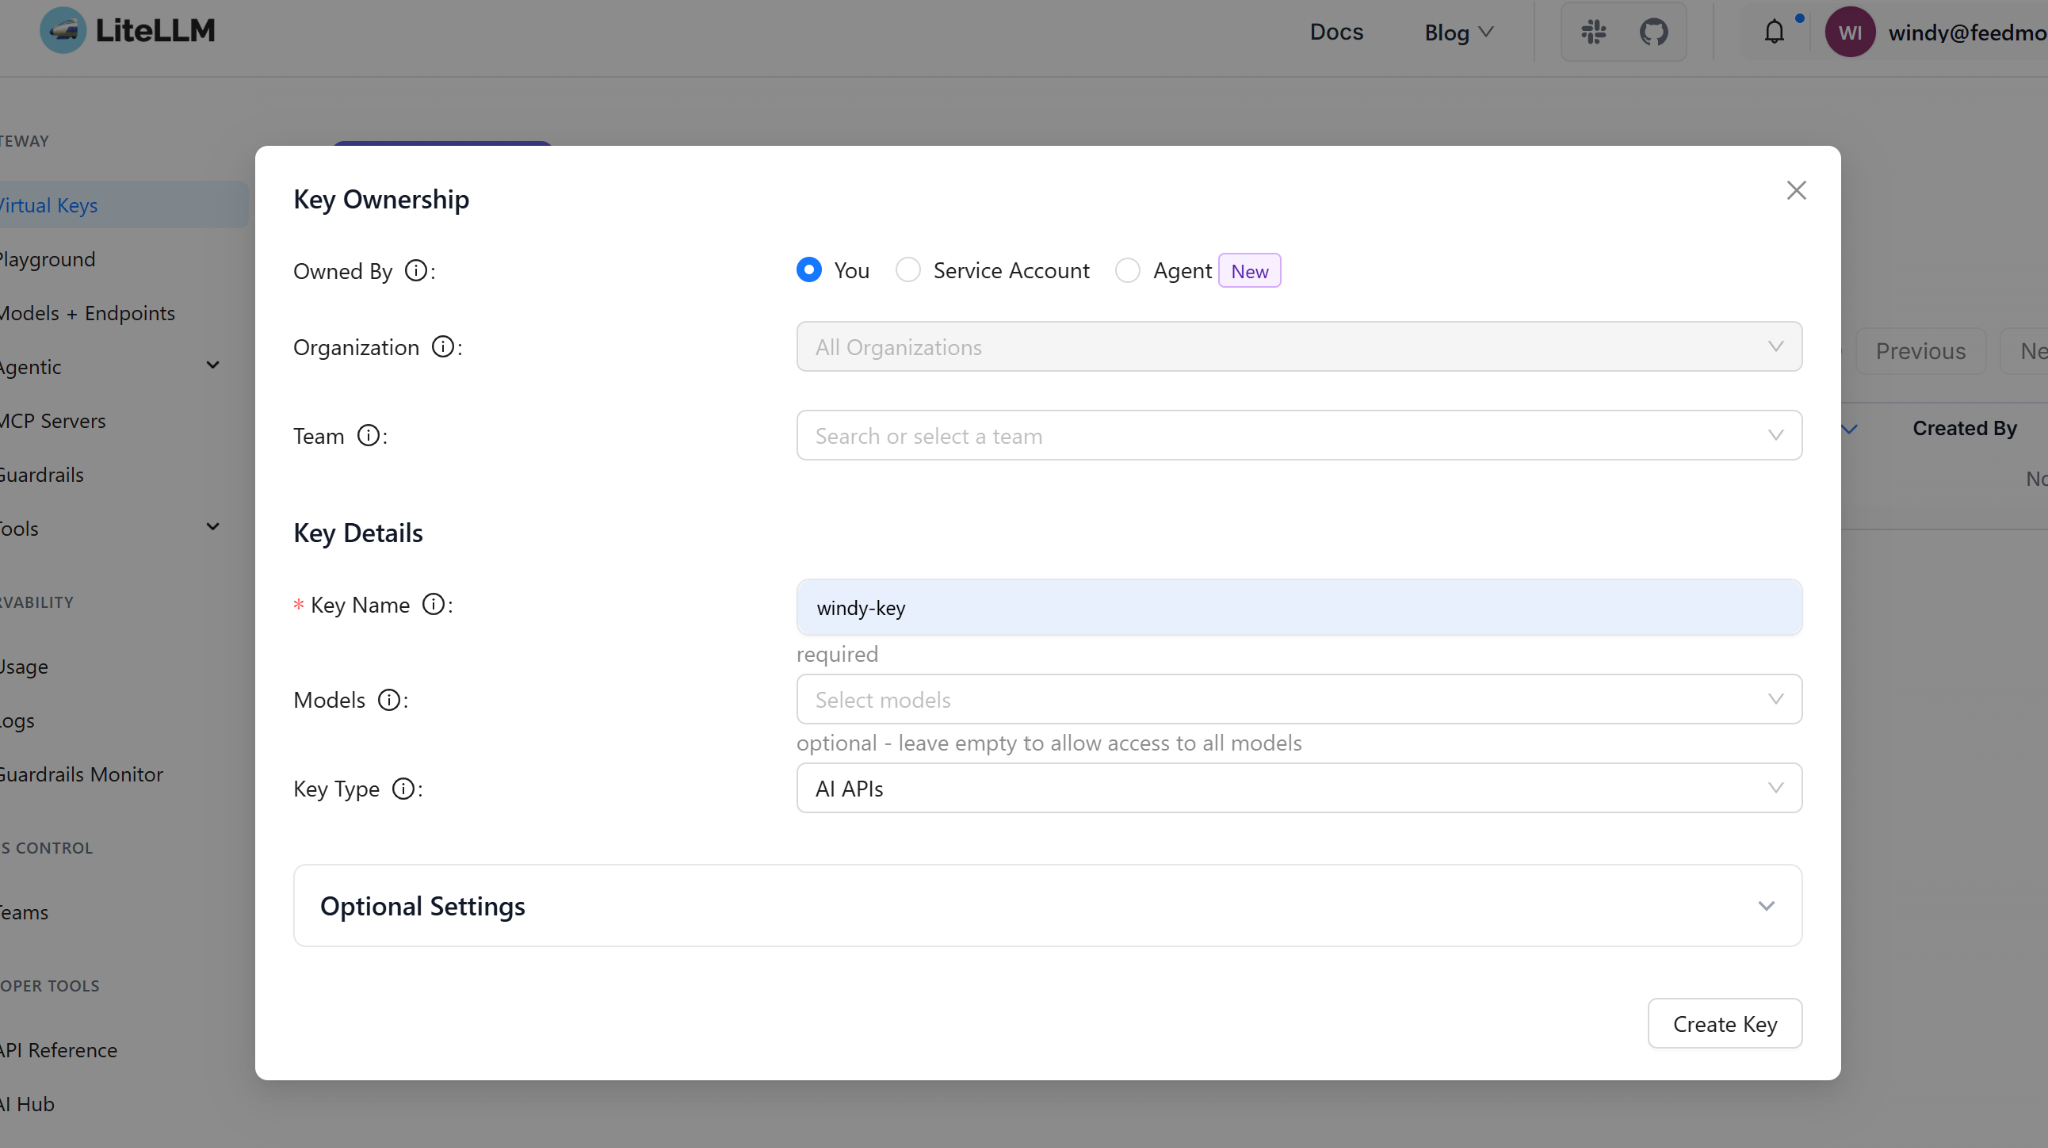
  5. In Key Name, enter a name you'll recognize, e.g. my-key. Leave the other options at their defaults.
  6. Click create. The page will show a key starting with sk-.
LiteLLM Virtual Keys page
LiteLLM portal - open Virtual Keys and click Create New Key
LiteLLM Create New Key dialog
Create a key name and click Create Key
Copy this sk- key immediately and store it somewhere safe (e.g. a password manager). Once the page is closed you usually cannot view it in full again. Wherever you see sk-xxxxxxxx below, it stands for your real key.
3

Add the LiteLLM Provider in CC Switch

Open CC Switch, select the platform you want to use, and add a new configuration. You can configure only the platform you actually use, such as Claude Code, Claude Desktop, Codex, Gemini, OpenCode, OpenClaw, or Hermes.
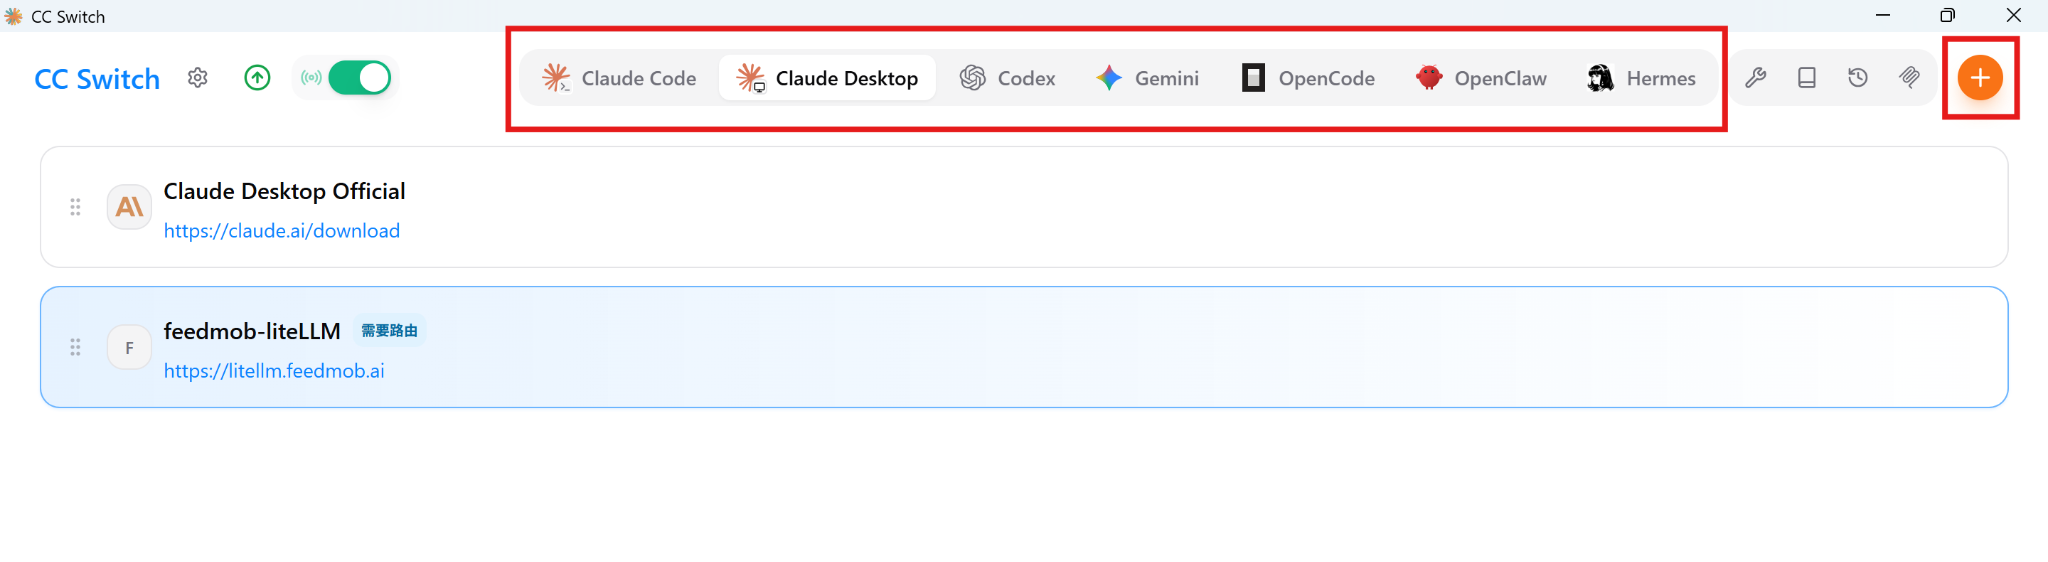
CC Switch platform selector and add button
CC Switch - select a platform and click the plus button to add a configuration

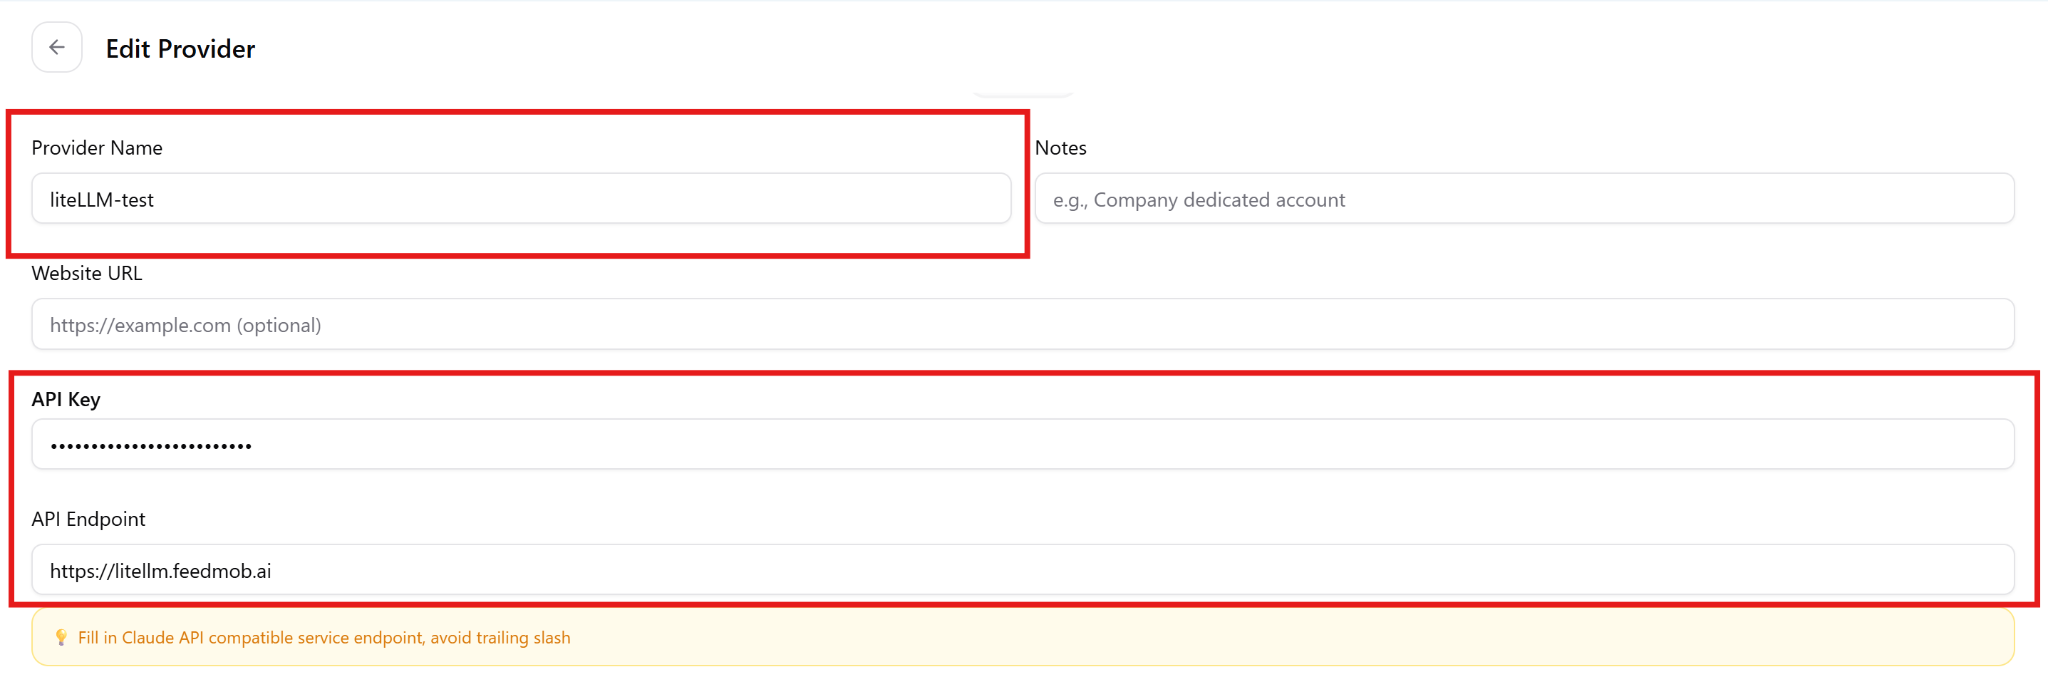
Common provider details

  1. Paste your sk-xxxxxxxx key into API Key.
  2. Enter the service address below in API Endpoint or Base URL.
  3. Keep the endpoint without a trailing slash.
LiteLLM Service Address
https://litellm-api.feedmob.ai
CC Switch provider configuration page
Provider configuration - name, API key, and LiteLLM service address

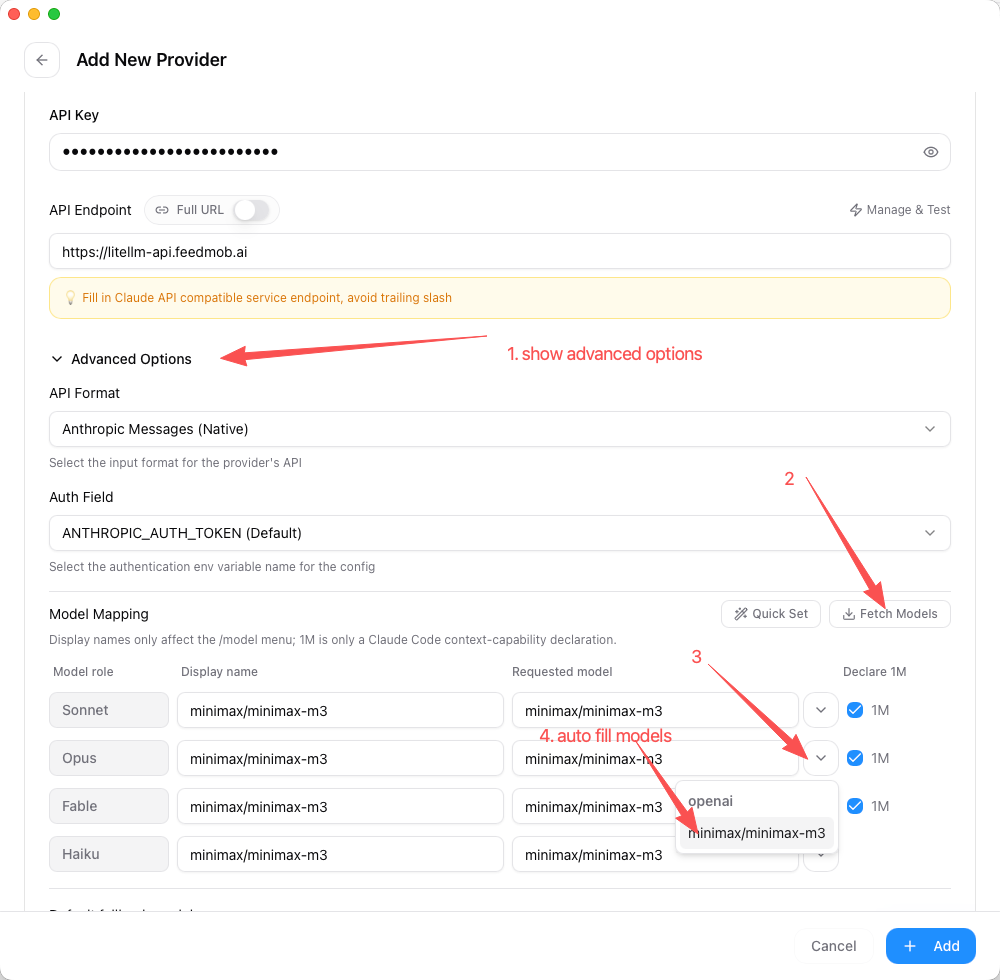
Claude Code: open Advanced Options for model mapping

For Claude Code, provider details and model mapping are on the same Add New Provider screen, but the mapping controls are inside Advanced Options.

  1. Open Advanced Options.
  2. Keep API Format as Anthropic Messages (Native).
  3. Keep Auth Field as ANTHROPIC_AUTH_TOKEN (Default).
  4. Click Fetch Models.
  5. Use the dropdowns or type directly to set each model row to minimax/minimax-m3.
CC Switch Claude Code provider configuration page
Claude Code provider - open Advanced Options, fetch models, and map rows to minimax/minimax-m3

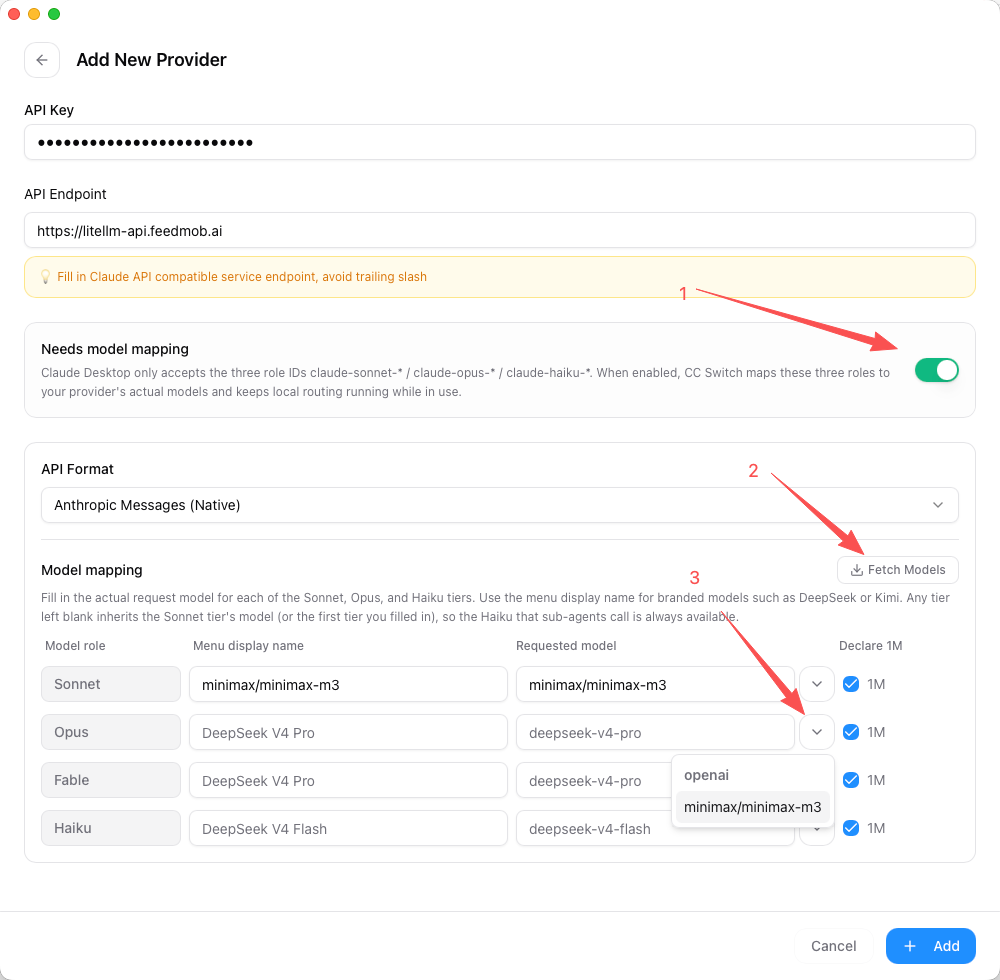
Claude Desktop: enable Needs model mapping

For Claude Desktop, model mapping is visible on the Add New Provider screen after you enable Needs model mapping.

  1. Paste your sk-xxxxxxxx key into API Key.
  2. Set API Endpoint to https://litellm-api.feedmob.ai.
  3. Turn on Needs model mapping.
  4. Keep API Format as Anthropic Messages (Native).
  5. Click Fetch Models, then select or enter minimax/minimax-m3 for each model row.
CC Switch Claude Desktop provider configuration page
Claude Desktop provider - enable model mapping, fetch models, and map rows to minimax/minimax-m3

Default fallback model

The screenshots above stop before the bottom of the form. After filling the visible model rows, scroll down and set Default fallback model to the same model:

minimax/minimax-m3
Use Quick Set if your CC Switch version provides it. For rows that show Declare 1M, keep it enabled. The fallback field is easy to miss because it appears below the visible part of the form.
4

Enable the Provider and Check Routing Requirement

Return to the CC Switch provider list, select your LiteLLM provider, and click Enable. Then check whether CC Switch marks the provider as Requires routing. This label is expected for the Claude Desktop setup.
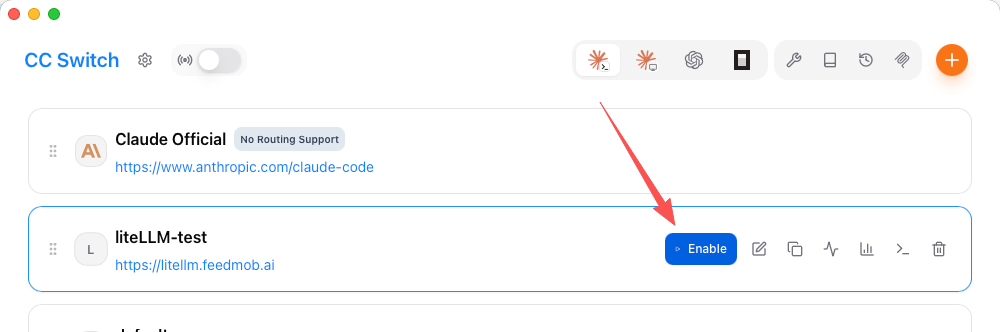
CC Switch provider list with Enable button
Provider list - select the LiteLLM provider and click Enable
  1. Click Enable on your LiteLLM provider.
  2. If the provider shows Requires routing, continue to the Routing step below before testing.
  3. If it does not show that label, close and reopen the target app, then send a short test message.
For Claude Desktop, enabling the provider alone is not enough. You must also enable routing so requests from Claude Desktop go through the LiteLLM provider.
5

Enable Routing for Claude Desktop

This step is required for the Claude Desktop configuration above. CC Switch uses routing to send Claude Desktop traffic through the provider marked Requires routing.
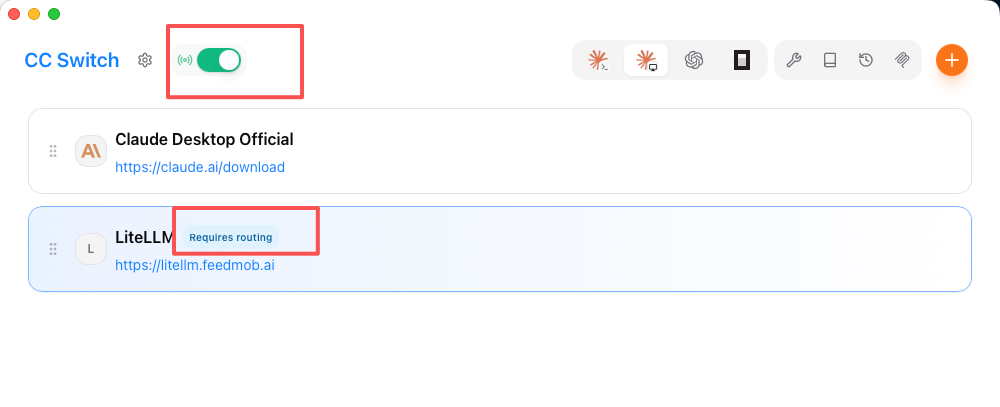
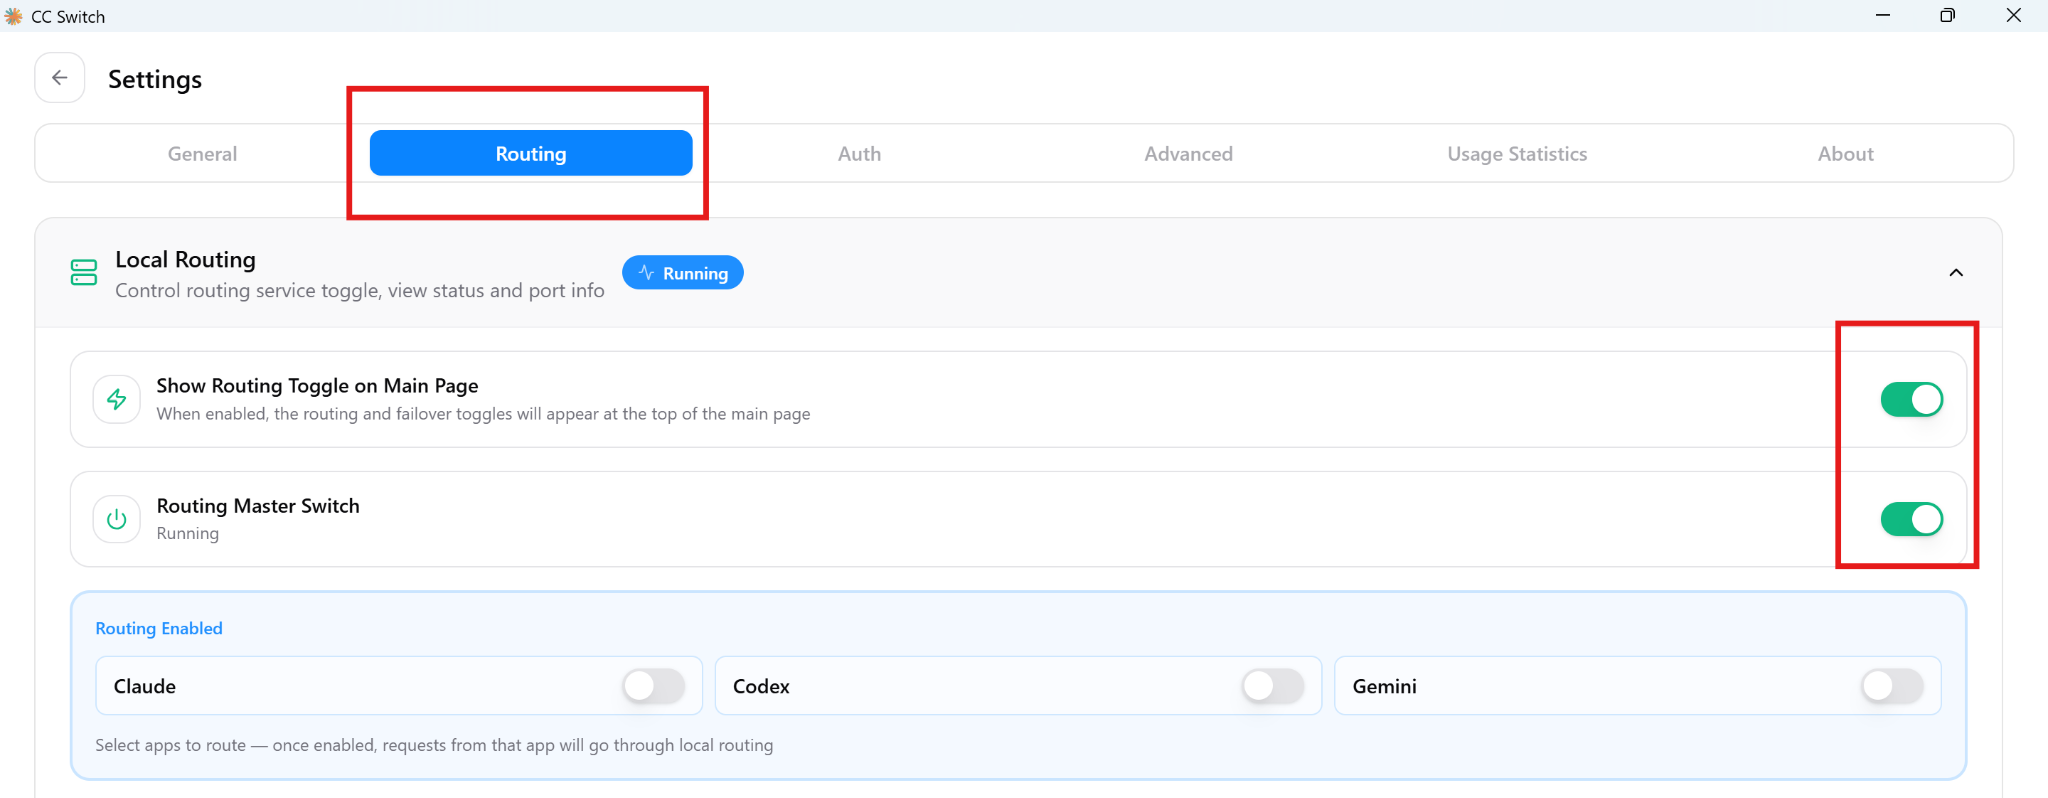
CC Switch provider list showing Requires routing and routing toggle
Requires routing - turn on the routing switch at the top before retrying Claude Desktop
  • Turn on the routing switch at the top of CC Switch.
  • If the top routing switch is not visible, click the Settings icon near the CC Switch title, open Routing, and enable the routing controls shown below.
  • After changing routing, close and reopen Claude Desktop before testing again.
  • If you are configuring Claude Code instead and it already works after clicking Enable, you can skip this Routing step.
CC Switch routing settings page
Settings - Routing tab with local routing and master switch enabled
When routing is enabled, keep CC Switch running while you use Claude Desktop. If the app still uses the old provider, toggle routing off and on once, then reopen Claude Desktop.
6

Verify It Works

Open the corresponding desktop application or code editor. If the account or gateway information is different from the account you previously logged in with directly, the connection to LiteLLM has been established successfully.
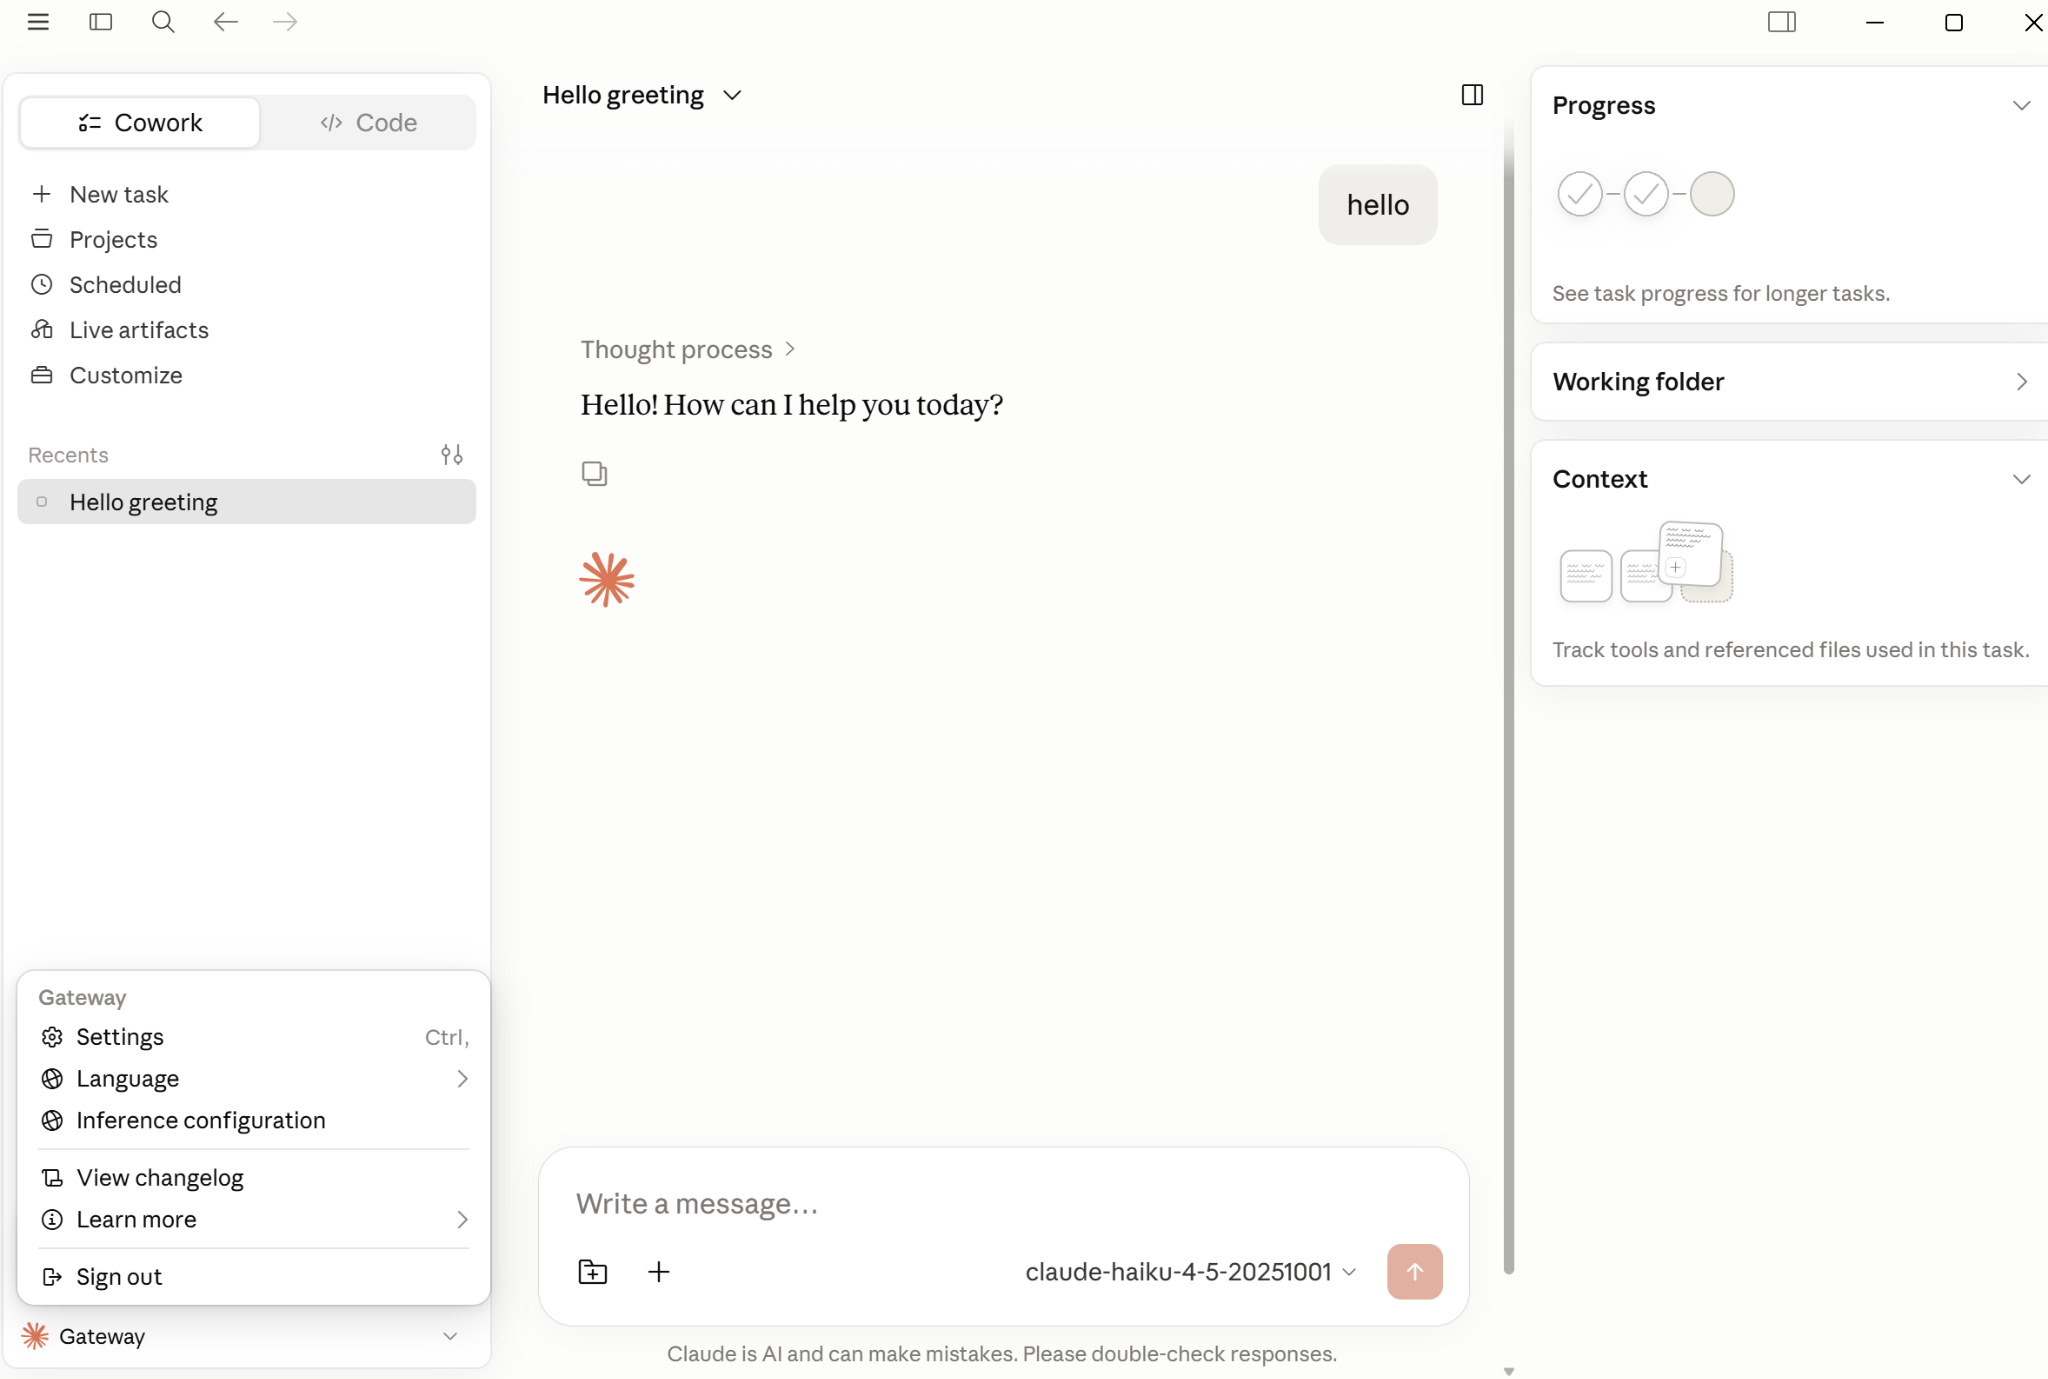
Claude app connected through CC Switch gateway
Example verification - the target app is now connected through the CC Switch gateway

You can also send a short test message:

Test prompt
Hello. Which model are you using?
  • If the app responds through the configured provider, CC Switch routing is working.
  • If it still uses the original account or model, check the service address, API key, model mapping, and routing switch first.
Frequently Asked Questions
How do I get LiteLLM credentials?

Contact Rao or the Dev team to obtain the LiteLLM login credentials and access instructions.

Forgot or leaked your key?

Go back to the Virtual Keys page in the portal (https://litellm.feedmob.ai/ui/), create a new one, and disable the old one.

The target app still uses my old account. What should I check?

Make sure CC Switch routing is enabled, the target platform is selected, and the target app has been restarted after the configuration change.

The provider connects but requests fail. What is the common mistake?

Check the endpoint first. CC Switch should use https://litellm-api.feedmob.ai, not the LiteLLM web portal address.