1
Download CC Switch for macOS
Use the FeedMob macOS installer below. This guide assumes you are using macOS.
Download CC Switch for macOS- Open the downloaded
CC-Switch-v3.16.5-macOS.dmgfile. - Install CC Switch into your Applications folder.
- Launch CC Switch once after installation.
The FeedMob LiteLLM API key is already prepared in the shared Claude Desktop provider import data, so you do not need to create a LiteLLM account or key yourself.
2
Import the Claude Desktop Provider
Ask Rao for the prepared CC Switch SQL import file. The SQL only contains the FeedMob Claude Desktop provider configuration.
- Get the prepared
.sqlfile from Rao. - Open CC Switch and go to the data import area shown in the screenshots.
- Select the SQL file from Rao and complete the import.
- Restart CC Switch after the import finishes.
- Confirm the imported provider is the FeedMob Claude Desktop provider.
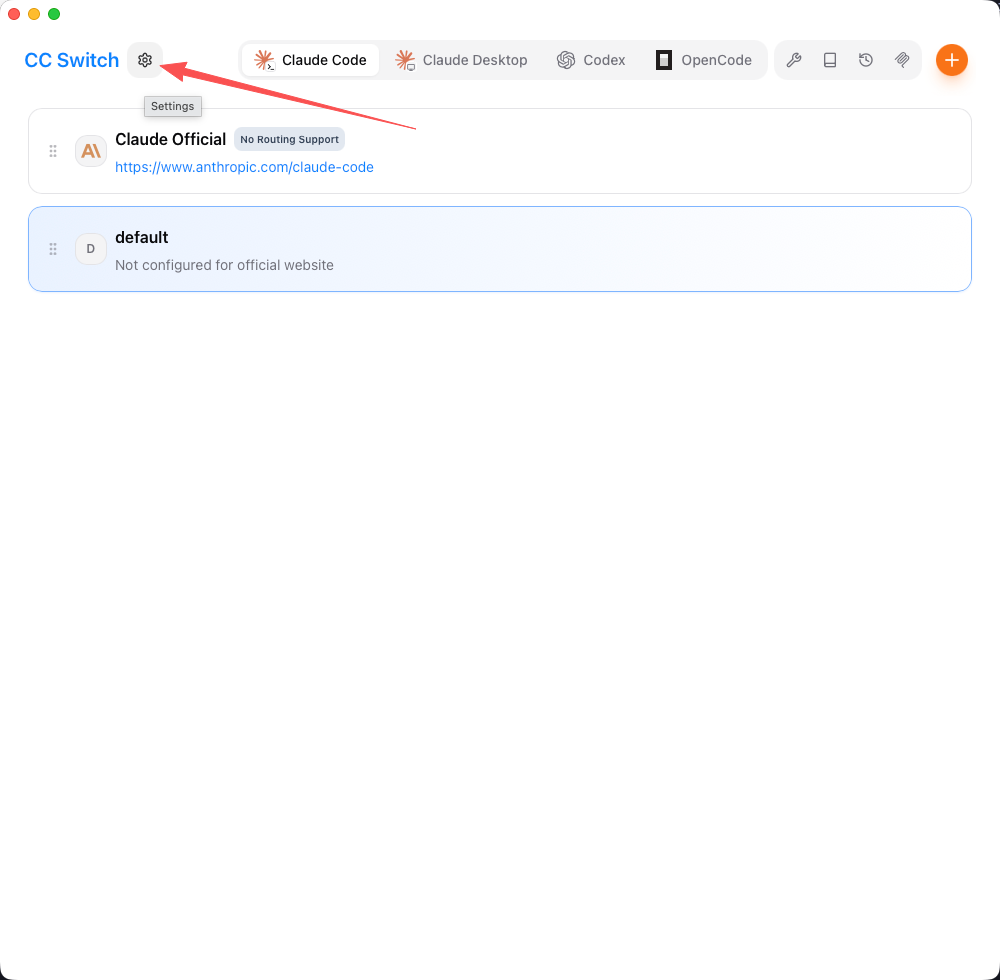
Import step 1 - open the CC Switch data import entry point
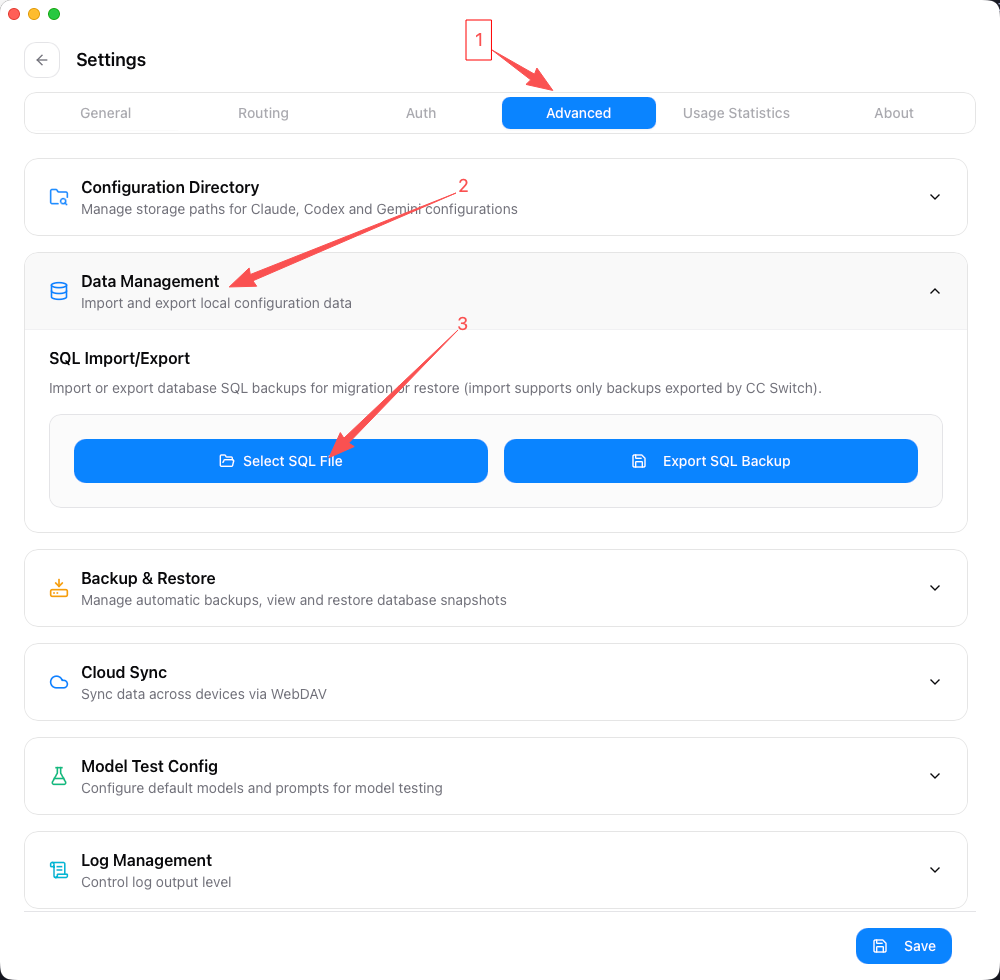
Import step 2 - choose the import option shown in CC Switch
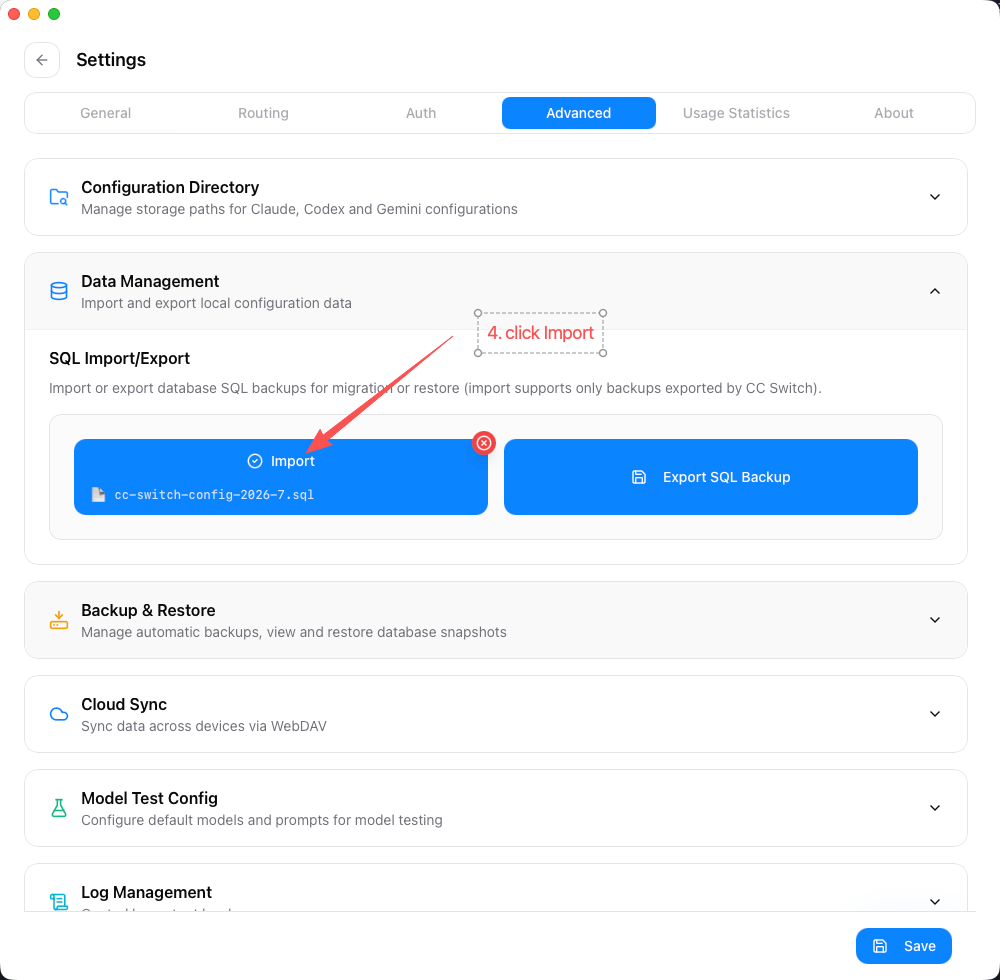
Import step 3 - select the prepared SQL file from Rao
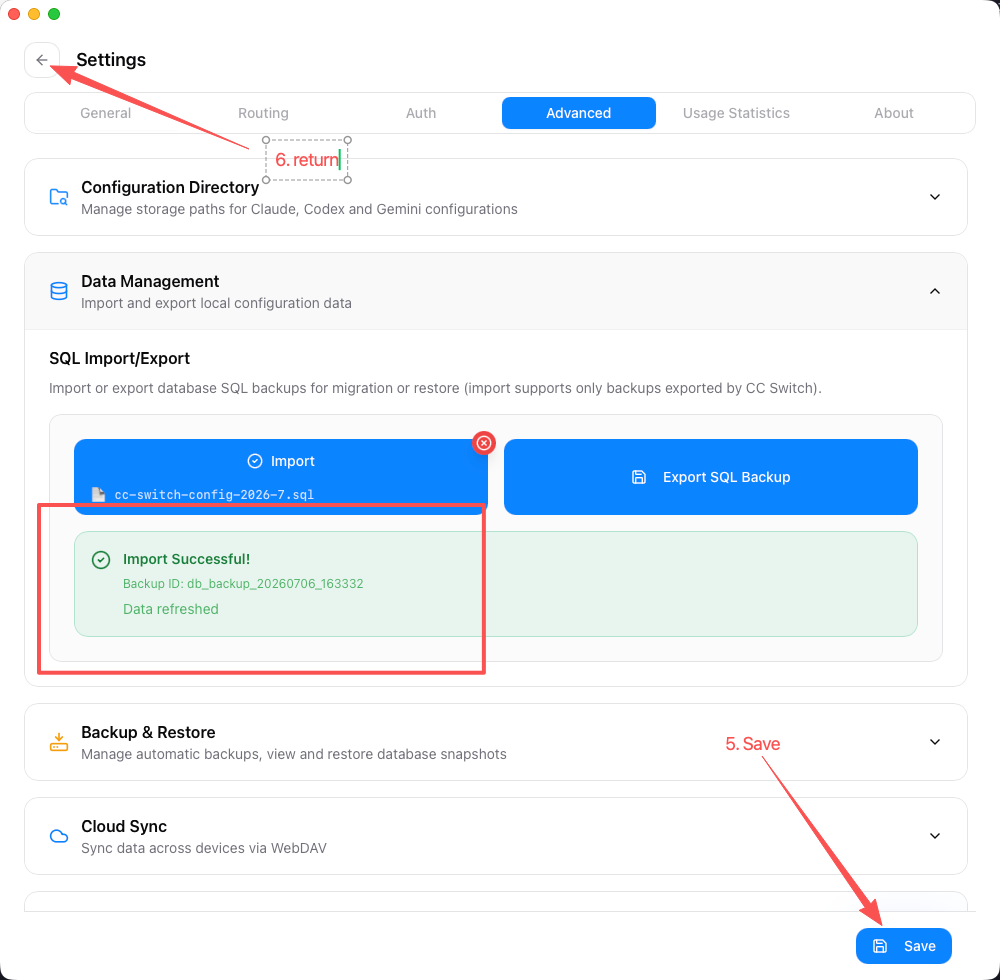
Import step 4 - confirm the import operation
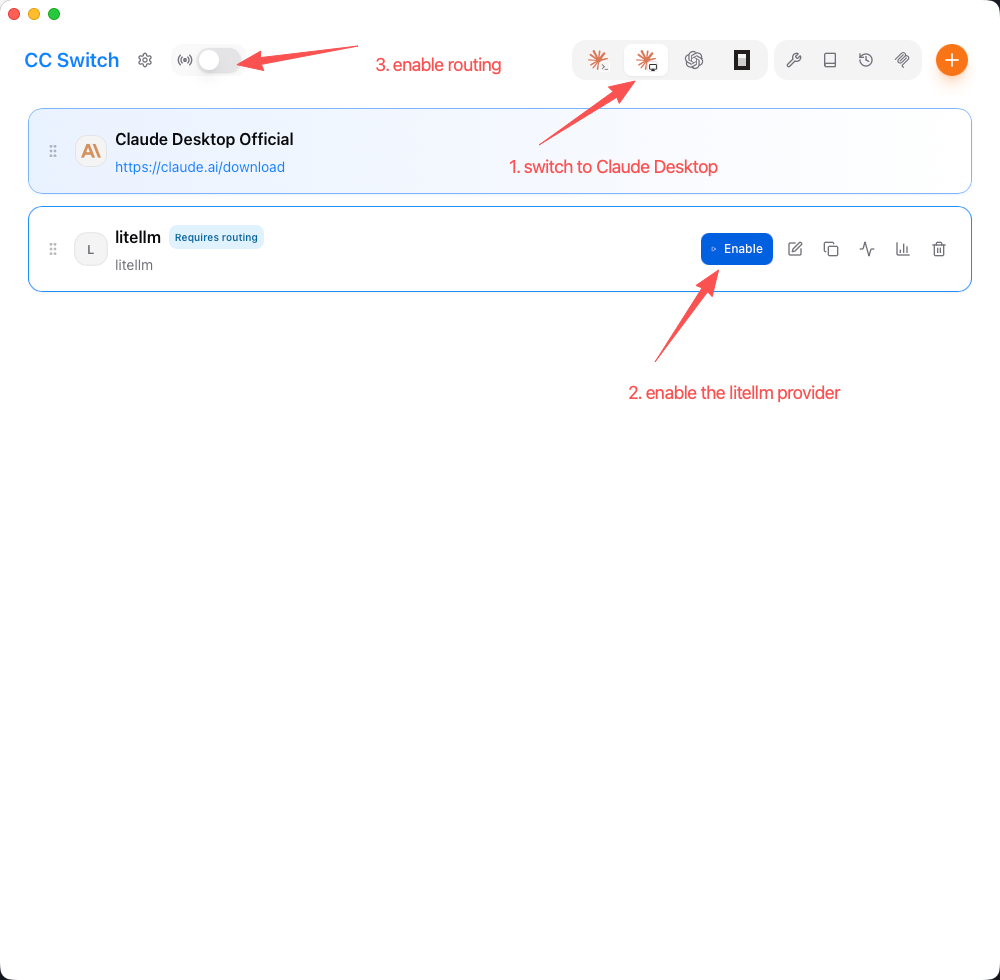
Import step 5 - verify the FeedMob Claude Desktop provider is present after import
Do not manually edit the imported API key or endpoint unless the Dev team asks you to. The SQL file already contains the FeedMob Claude Desktop provider configuration.
3
Enable Routing for Claude Desktop
The imported SQL is for Claude Desktop, so enable routing before testing Claude Desktop.
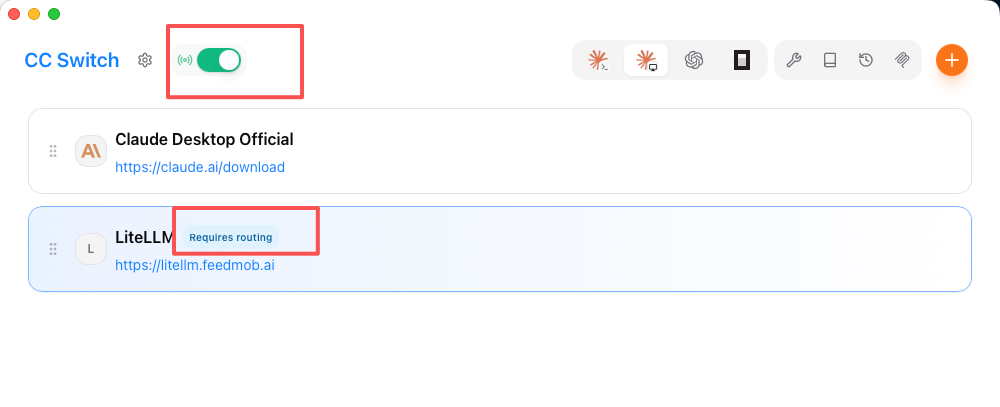
Requires routing - turn on the routing switch at the top before retrying Claude Desktop
- Turn on the routing switch at the top of CC Switch.
- If the top routing switch is not visible, click the Settings icon near the CC Switch title, open Routing, and enable the routing controls shown below.
- After changing routing, close and reopen Claude Desktop before testing again.
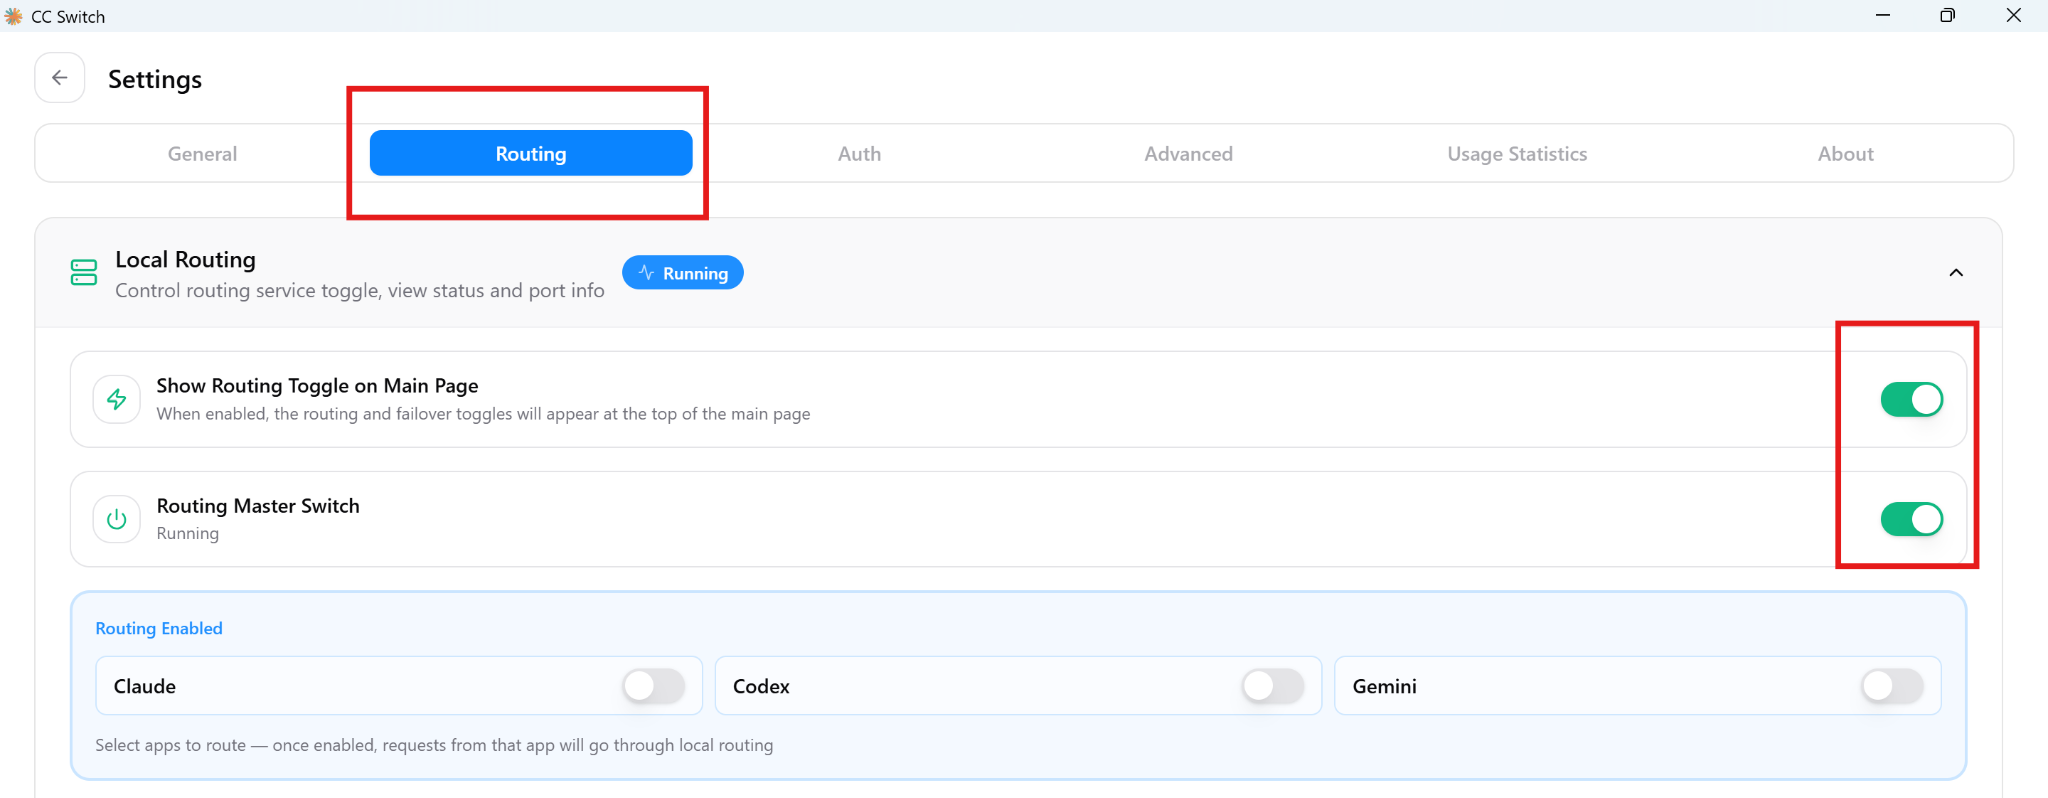
Settings - Routing tab with local routing and master switch enabled
4
Verify It Works
Open Claude Desktop. If it uses the imported FeedMob provider, the CC Switch setup is working.
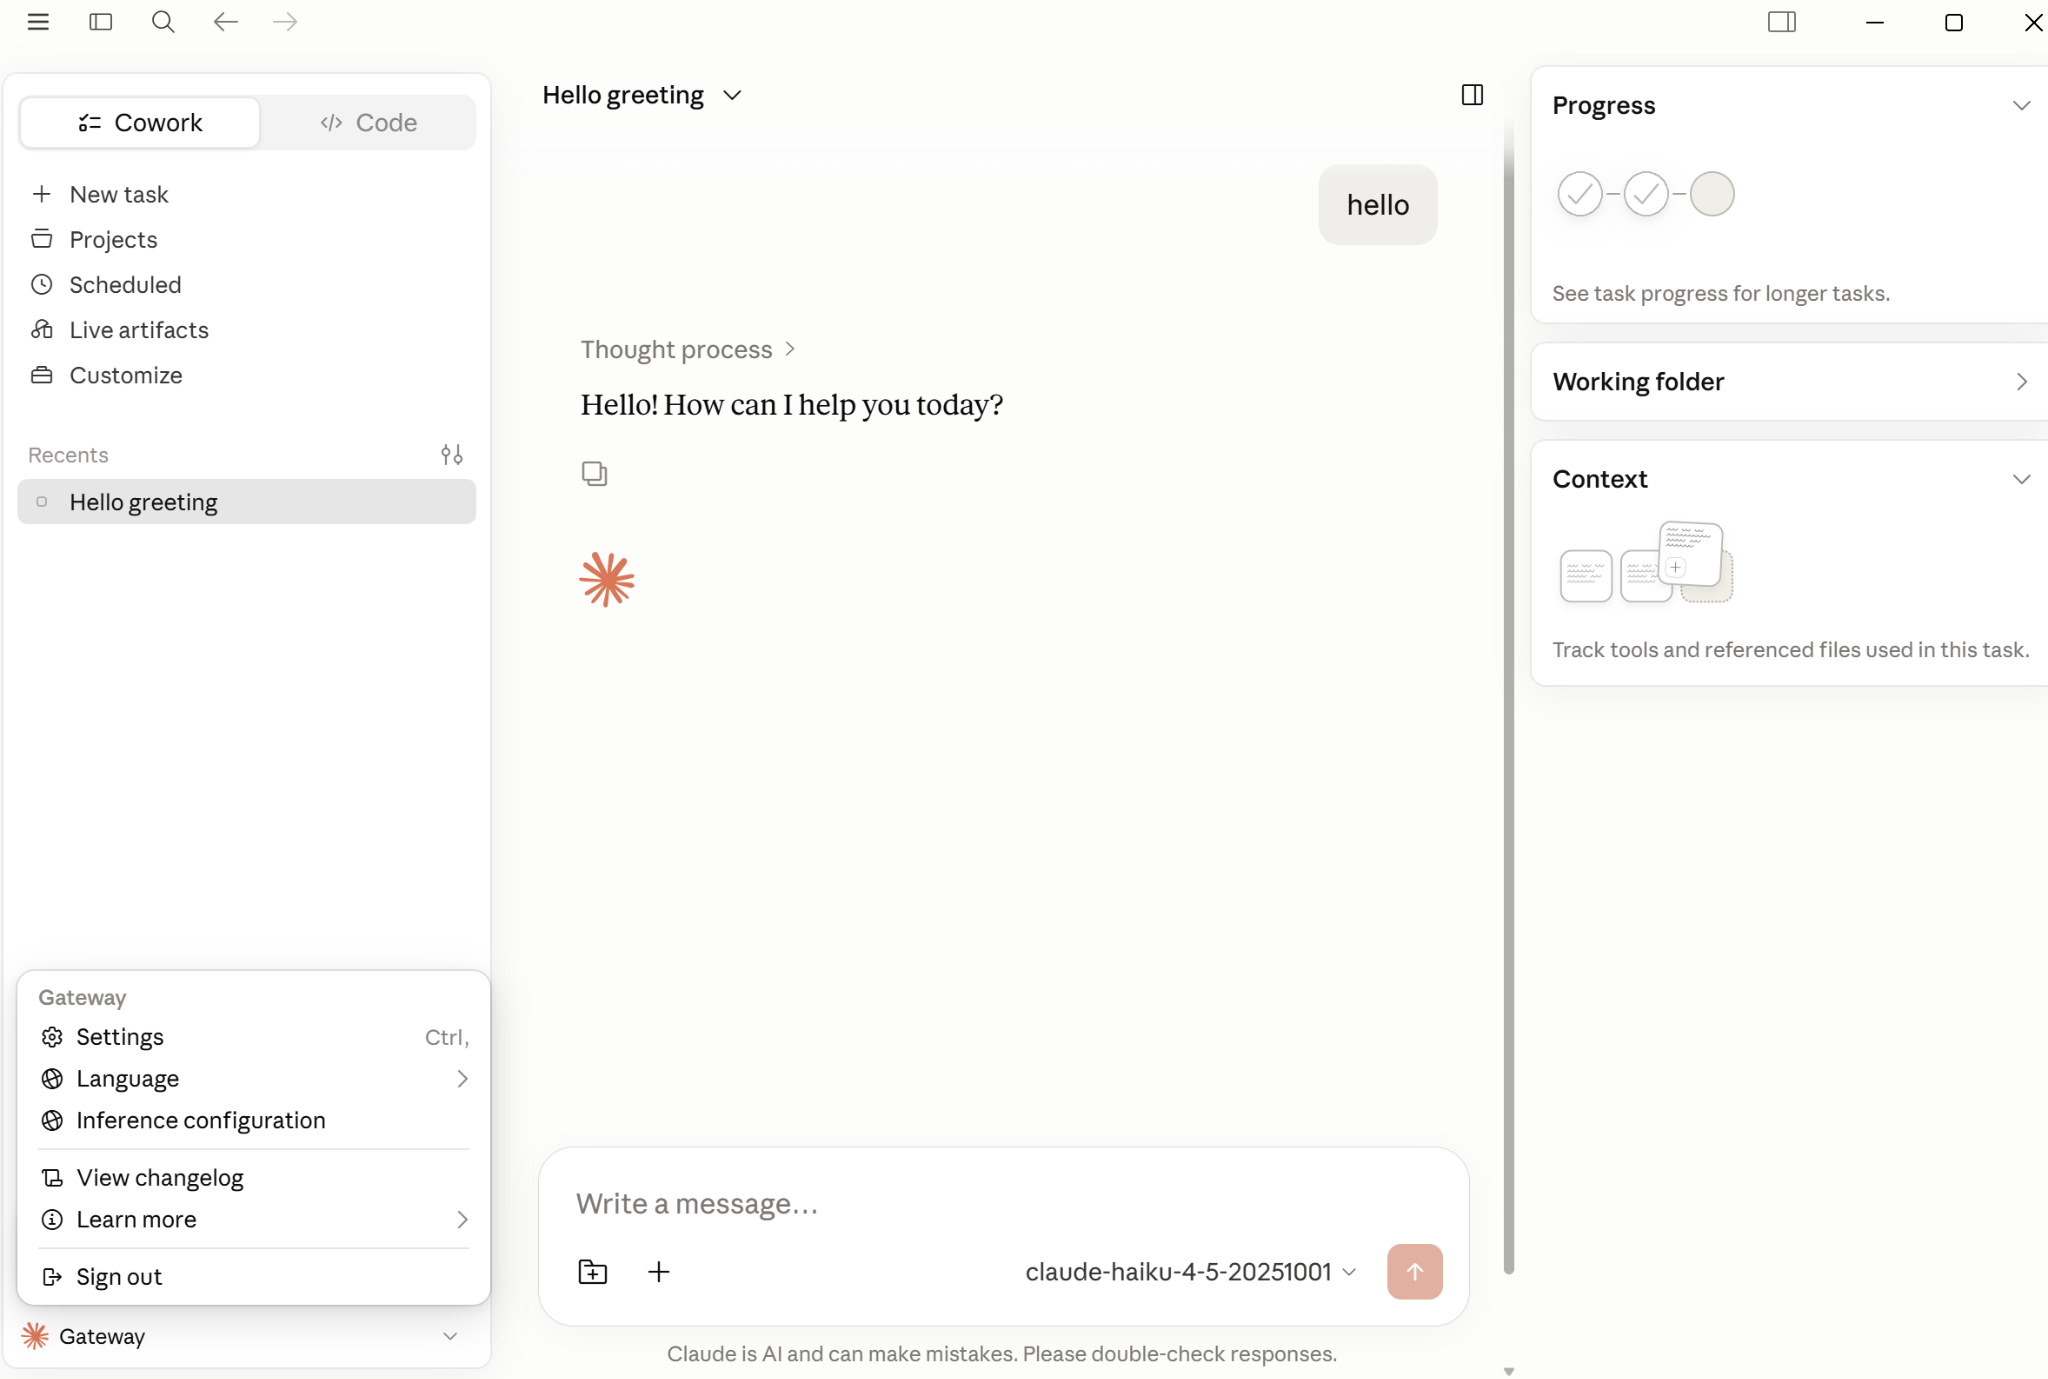
Example verification - Claude Desktop is now connected through the CC Switch gateway
You can send a short test message:
Test prompt
Hello. Which model are you using?- If Claude Desktop responds through the imported provider, CC Switch routing is working.
- If it still uses the original account or model, check whether routing is turned on and Claude Desktop has been restarted.
Frequently Asked Questions
Where do I get the SQL import file?
Ask Rao for the prepared CC Switch SQL import file.
Do I need to create a LiteLLM account or API key?
No. The shared SQL import already includes the prepared FeedMob Claude Desktop provider configuration.
Where is the old manual setup guide?
The original guide is still available at manual-setup.html.
Claude Desktop still uses my old account. What should I check?
Make sure CC Switch routing is enabled and Claude Desktop has been restarted after the import.